Friday, 13 November 2015

Group Project, Lowering the Tri Count/ Mesh Optimization. (CGA Year Two)

Within this post I will demonstrate the process I used to reduce the tri count on My low poly level. this is extremely important as i'm limited to a total budget of 100,000 tris, this includes assets. It is also a good habit to get into as reducing the number of tris lowers the impact the mesh has on a PC's performance. This creates a smoother and more enjoyable experience for the player.

This is something I will repeat for all objects within the scene.  

I selected and isolated the ground level.


I then selected all of the faces that will make up the floor and extracted them. This separates the floor from the walls. This will make it easier for Me to texture the level.


546 tris.
Once the floor was separated I selected all of the non crucial edges. These are edges that don't create or hold the shape of the floor.


Holding Control I deleted the edges. Both the edges and the vertices connected to them have now been deleted.


I then straightened the remaining edges by holding the V key and snapping the vertices in line with each other. Leaving Me with a neat and tidy, low poly mesh.

136 tris.
Alternately I could of deleted the floor and replaced it with a single plane like the one below. I adjusted the edge loops on this plane to match the walls of the lower level. I did this so that if I chose to use this plane instead of the already existing floor, I would be able to see an outline of the walls and floor when I saved it as a UV snapshot. This would allow Me to texture one room at a time.


I repeated this process with the walls then placed the floor back in as a separate object. Leaving Me with a much neater topology than before.

The finished result.
I later merged a number a vertices together using the target weld tool, this created triangles across my mesh. However triangles aren't a problem if your only applying diffuse maps and not taking the mesh into a program such as Z Brush.

Using the target weld tool helped Me to reduce the tri count even further without changing the shape of the objects I was optimizing. 

Group Project, Building the Spiral Staircase. (CGA Year Two)

The tower in the level was the last part of the game I modeled I did this as I believed it would take more time than the other areas I had to model. However it didn't actually take as long as I expected.

Initially I had just placed a long turning Slope in the tower to act as a placeholder staircase. I used this as the basis to create the actual staircase.

The staircase revolves around the central pillar hugging the outside of the walls. The towers design was inspired by medieval tower designs. These were common in Europe at the time. Especially In Germany where Gothic influence could be clearly seen in many building designs.


I started off by duplicating the stairs I had used in the main entrance.


I positioned them above the long curving slope.


I then used the Non Linear Bend Tool to twist the stairs to match the curved slope. However they didn't quite fit so I restarted the process and doubled their length by duplicating them, then re joining them. I then re applied the Non Linear Bend and bent them into position. I made a few tweaks to the stairs using Soft Select so that they would fit perfectly.


Once the stairs were in position I placed multiple edge loops along the slope. I did this to match the number of edges on the stairs so that I could join the two together. I then combined them together and merged the vertices to create one object.


I then placed the stairs back inside the tower making sure they fit perfectly allowing enough room for both the player and camera to maneuver.


I went on to Optimize this Mesh and reduce the tri count by deleting edge loops and merging vertices using the target weld tool. This will be covered in a later post.

Here are a few examples of camera angles that could be used in the final game. I have again used placeholder characters to give a sense of scale.


Group Project, Building the Level. (CGA Year Two)

Now that I had built a basic Grey Box and some assets I began building up the actual environment itself. Building assets and researching old architecture had really helped to expand the vision I had for this level and the game as a whole.  Unfortunately I hadn't received any concept artwork for the Environment at this point so I decided to press on without it and design the look myself. I started to form a clear image in my head as to what I wanted the level to look like. I then set about building upon the Grey Box.

Throughout this process I was constantly checking whether or not the level and assets fit to scale with the player model. I used Ewan's reference boxes to do this.


The first thing I did was change the layout of the pillars on the upper balcony area. Before there were many pillars in such a small space. Now there are eight pillars. I built the new wooden pillars to fit in with the overall theme of the game. The pillars are also low poly so they shouldn't have too big of an impact on the final tri count. Spreading them out also allows more room for the player to navigate the space. 


I began looking at the level layout at the same time and responded to feedback from the game Designer. The grey box worked well however one of the corridors was slightly too narrow. I corrected this and also moved the position of one of the doors You can see below. This was to help improve upon the game flow. Now when the player enters the downstairs corridor from the main entrance they have enough room to move and aren't immediately confronted by a door. This means instead they see a corner, this will hopefully build upon the atmosphere of the game as the player won't know whats around the corner.


The next step for Me was to place in all the doorways so they can be coded to open and close. I built a single doorway, a double doorway and a main entrance doorway. All in an old fashioned style. I will cover these assets more when I come to the texturing stage.

The most important part of the environment though that I built were the stairs and clock in the main entrance. I wanted the main entrance to represent wealth and have a sense of awe surrounding it. Back in the 1910's it was standard practice for someone to demonstrate their wealth through their possessions. This included their home/ buildings they own. Since this level is a public or privately owned library it would make sense for the owner to try and build a grand entrance to try and impress guests.

Here You can see the main stairway along with the entrance to a secret room.


I placed pillars around in the corner of each room to give the building the illusion of structural support. It also helps to fill the space and make the rooms feel more realistic.

You will notice in some of these screenshots blocks in the shape of people. I made these as placeholder characters to the exact scale given to us by Ewan, our tutor. This allows Me to build the level to the correct scale, and to make sure the assets I create are also to the correct scale.


I added in a fireplace to conceal the entrance to a secret room. This will form part of a puzzle when the game is complete. The renders I take here are also for the Game Designer to get a good idea of possible camera angles.


I finished the Grey Box by adding in all of the windows, and building the outside of the tower. the final thing I did was to place in the spiral staircase. And the banisters within the tower. I will cover this step in the next post.


Z Brush: Using Dynamesh (CGA Year Two)

In this weeks lesson We learnt how to use Dynamesh in Z Brush. Dynamesh retopologizes a mesh to even out edge flow/ vertices.

Before I used Dynamesh.

After I used Dynamesh.

Tuesday, 3 November 2015

Rigging a Character in Maya (CGA Year Two)

In this weeks class We learnt how to rig and animate a character in Maya 2016.


I found animation difficult to begin with as I have never tried it before. It is something I will have to practice more before I am confident with it.

Wednesday, 28 October 2015

Z Brush: Sub Tools (CGA Year Two)

In this lesson We learnt how to use Sub Tools effectively in Z Brush. I also learnt a bit more about masking.


Unfortunately due to a lack of Z Brush license's I was only able to take part in half of the lesson.

Tuesday, 27 October 2015

Using Navmesh in Unity: Part Three (CGA Year Two)

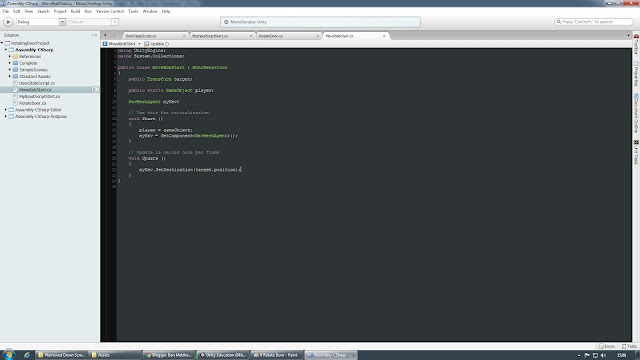
In this lesson We continued to learn how to create and use a Nav Mesh in Unity. You'll find more information about the code I used in the screenshots below.