Showing posts with label Red Hail (Ninja Kebab). Show all posts

Wednesday, 13 April 2016

Part Eight: Ninja Kebab, First Person Shooter (CGA Year Two)

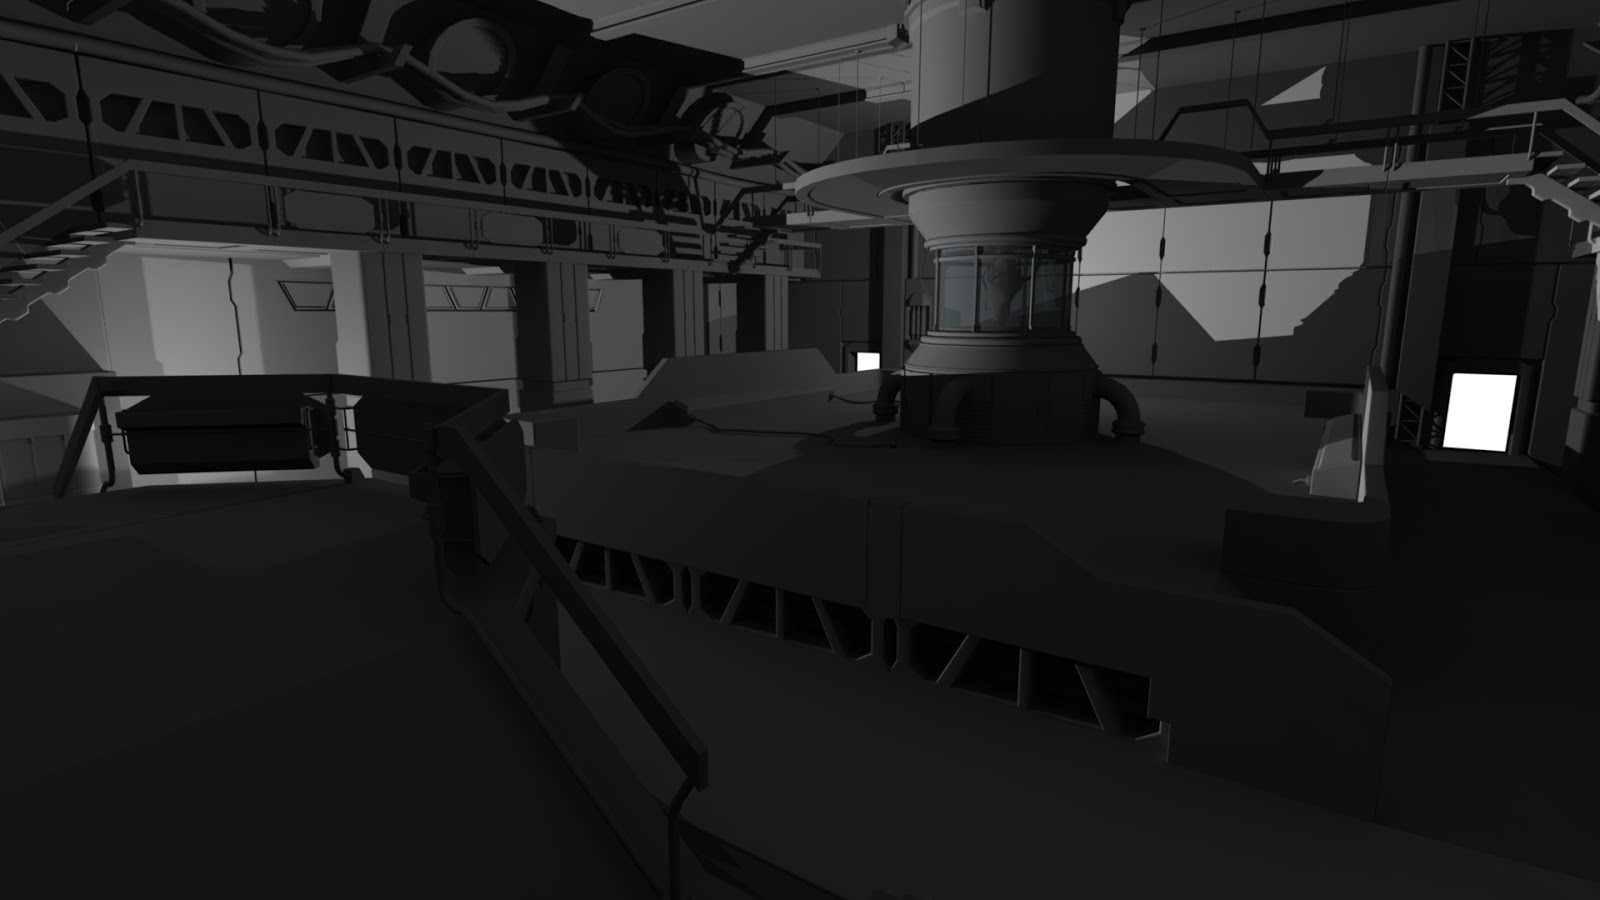
This is the start of the baking process, George (Game Designer) removed anything with a high amount of detail, or an emmisive texture to lower the time it took to bake. He did this to get an idea of how long it will take to bake, and to get the settings right before baking. Otherwise it could be a waste of time baking something for a whole day, if it doesn't turn out the way we want it.

However this does demonstrate what the models I built will look like in the final version.

Screenshots below.


The grey crate in the center of the room (left hand side of the image) was modeled by our prop artist, Reece.


Part Seven: Ninja Kebab, First Person Shooter (CGA Year Two)

I placed all of the assets in engine and applied PBR materials to them. I then re made the level in engine by duplicating assets and putting them into the correct place. I used the old grey box as my reference.

I also applied finishing touches such as the blood splat decals.

Here are some screenshots of the level.


After a group meeting we decided to extend the level to allow the player greater movement. However I didn't want to push the tri count up any further as our total asset count is limited to 300,000 tris. So I duplicated the lab, turned it around by 180 degrees, and placed it onto the back of the already existing room. This saves on tris but looked strange. So I created a wide hallway to connect both rooms via the two small doors at the back of the room.

Connecting hallway.


This is the other room, I removed the tank in the middle of the room. I did this to give the prop artist room to place his assets in game. I also wanted there to be an obvious difference between the two rooms so the player knows where they are.


I made sure to leave enough room whilst building this level for the prop artist (Reece Stansbury) to fill out with his assets. This is why (in its current state) the level looks minimalist.

Overall I am very pleased with the result. Its close to the concept and has provided us with a solid level to build a great game off of.

I handed the level over to the game designer a week ago. He will start the baking process. Then integrate it into the current build of the game.

Tuesday, 12 April 2016

Part Six: Ninja Kebab, First Person Shooter (CGA Year Two)

This post will explain how I created seamless materials using Quixel; for our game, Red Hail.
Using Razvan's final concept as reference I went about creating multiple materials; I didn't however just take materials straight out of Quixel's default library. I created my own by blending them together.


By adjusting the normal's I managed to create a nice effect on this white plastic. This material was the most important as it will be placed on most of the assets in scene. I also used dynamask to create depth.

Painted Steel.


I used ndo on this material to create repeating lines. This simulates (using a normal map) a bumped surface, I will place this both on cables, and panels.

I also created transparency maps to use in game. Transparency maps allow me to fake detail and create shapes that would otherwise be expensive on my tri count.


I created a black and white version of this grid, then placed it into the alpha channel of the specular. map. Then when it is placed in engine I can set the alpha to be transparent, making anything that's black on the alpha transparent.

Image placed into Alpha channel.
I made the grid a 4k seamless texture using offset in Photoshop. However I forgot to take screenshots of this process. It is important for me to make this texture seamless so I can tile it in Unity if I need to.


I also created blood splats and a set of sci-fi decals to be placed around the level. These were created using the same method as the grid.


Here you can see exactly how I went about setting up my materials in Unity.

Thursday, 17 March 2016

Part Five: Ninja Kebab, First Person Shooter (CGA Year Two)

I began UV work on assets within the level. I copied each individual asset within the scene so that I have 1 copy of everything. 1 of each panel type, 1 of each cable etc. I moved them out into empty space in a long line, then began UV work on them. I worked my way along the line of assets from left to right, ensuring the texel density was the same; or similar on every object. 

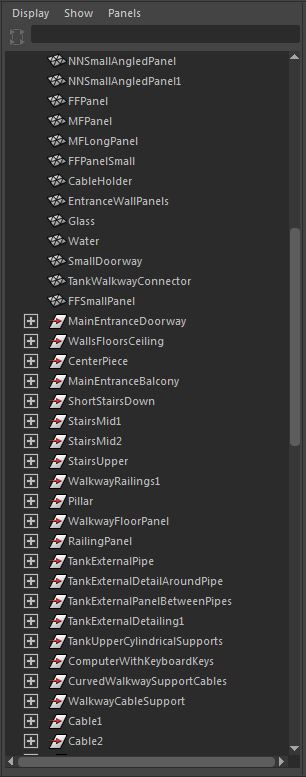
I arranged each object in the outliner and regularly cleaned the object history. Because I had so many panel variations I had to find a way of organizing them that made sense, so I used M, F and N to represent male, female and neutral. Similar to the system that's used to label cables, this allows me to look at a panel from the front and by looking from left to right understand which panel it is. For example, MFLongPanel; when I look at this panel from the front I know that the left hand side is male and the right hand side is female. I also know that the panel is long and not short. Organizing my outliner like this helped me to keep a handle on things, sometimes when your working with a busy Maya scene it can become difficult to keep track of your objects. Setting up my scene in this way ensures this doesn't happen.

Its important to note that I will be using seamless textures across all the assets I create for the environment. This will allow me to re use textures; lowering the size of the project, saving me time, and lowering the number of materials. This is important as we are limited to having 100 texture sheets. This is the reason you can see the UV space being repeated on each object.


The original meshes that I copied the assets from were all combined, then placed into a layer. This allows me to hide the level but use the wire frame to position the assets correctly later on.


Once all of the UV work was complete I placed each individual asset back into position using the wire frame as reference. I then froze the transforms and reset the pivot back into the center of the world. I did this so that when I import the asset into Unity it will be in the correct position. This is especially important for assets that are only placed once in the game world. For assets that are going to be placed multiple times I will have to copy them around, and put them in place manually.  


You can see here how I have placed one of each asset into position using the wire frame as reference.


The next task for me was to clean up my hierarchy in Maya, I started by deleting the history along with any unwanted geometry. I then deleted any unwanted transforms and groups.


I then grouped any meshes together to create well organised assets. This also allows me to import a whole asset but apply different materials to different parts of the mesh.


Once I had the hierarchy organised I began importing assets into Unity.


Here are all of the assets placed into the unity project. I can now copy them around to create the environment.

Thursday, 18 February 2016

Part Four: Ninja Kebab, First Person Shooter (CGA Year Two)

As a team we decided to stop developing a linear level, it became clear that we were taking on too much work. So we all agreed to create a small, wave based experience. This will allow us to create a more polished game.

We've also settled on a name for the game, Red Hail.

After weeks discussing and experimenting We finally settled upon a design for the main room within our game. Our concept artist (Razvan Prajanu) handed me a final 2D concept piece for the main area within our game. This room will be the starting point for the player, and the main area the player will defend against waves of enemies.

I built the room in Maya over roughly 5-6 days. I used Razvan's concept as reference. However I was allowed to make changes where I want; this gave me the ability to alter the environment where I see fit. I did make a few subtle changes but I tried to stick to the original concept best I could. Any changes I made were ran past both the concept artist, and game designer first to ensure continuity between 2D and 3D.


I handed the completed grey box over to our lead game designer who put it in engine. There are a few tweaks to be made, however for the most part the modeling is complete. I will begin UV work soon and start the process of transferring each asset to Unity; I will then build the final environment.

Friday, 29 January 2016

Part Three: Ninja Kebab, First Person Shooter (CGA Year Two)

I modeled an early, modular, floor panel concept given to me by Razvan Prajanu. This was part of the early experimentation I did to try and figure out ways to lower the number of tris in the scene. I also experimented with Quixel in order to gain a deeper understanding of PBR workflows. And to demonstrate to the rest of the team ways in which we could go about creating the environment.


This is the finished modular panel in 3DO, I used a colour ID map to assign the material. I stuck to Razvans concept best I could whilst creating this. But after a brief discussion with the team we decided not to use this panel in the environment.

Part Two: Ninja Kebab, First Person Shooter (CGA Year Two)

I carried on creating initial 3D work whilst I waited for the concept artists to finalize their concepts.

I created a modular set of pipes for the game using Maya. This will help to bulk out the environment and hopefully create an industrial atmosphere to immerse the player into the world. Pipes are great in games as they provide the illusion of purpose, the space immediately feels more important as it is given meaning.

Creating a modular set allows me or the game designer to quickly build up an area as and when We please without having to model/ texture a new asset every time. It also allows us to save on tri count and easily create or alter cover points by placing pipes where we need them.


All of the pipes in this scene were created using only the above segments. I repeated them around layering bigger pipes behind the smaller pipes.


This modular pipe set might not be used in the final game, however they demonstrate how I can use modular pieces to flesh out an environment quickly. Modular assets are important if we want to create a large environment, whilst keeping the project size down.

Tuesday, 26 January 2016

Part One: Ninja Kebab, First Person Shooter (CGA Year Two)

This is the first post covering my role this term as an Environment Artist within a team.

The team i'm working with consists of . . .

  • Game Designer/ Coder/ VFX: George Burchmore.
  • Environment Artist: Ben Matthews (Me).
  • Environment Artist: Reece Stansbury.
  • Concept Artist: Razvan Prajanu.
  • Concept Artist: Rastislav Smolen.
  • Character Concept: Steve Welch.
  • Character Artist: Jay Pickett.
Together we have formed a team called Ninja Kebab. your probably wondering why we called ourselves Ninja Kebab, it all comes down to our lack luster attempt to come up with a suitable name for our team. And somehow we fell upon Ninja Kebab. However We hope a lighthearted name will catch the attention of our audience.

Our team logo, created by Steve Welch.
We decided to create a first person shooter this term. Specifically an old school style fps such as Doom in a style similar to Grindhouse. A slightly over the top fps that is fun and addictive to play.
We hope that being ambitious and choosing to create something challenging will help us to learn more about game development and level design.

What is Grindhouse? - http://www.urbandictionary.com/define.php?term=Grindhouse

My role as an environment artist will be to aid the game designer/ concept artist in creating a fun and interesting level design. Once we have settled upon a good design I will build the level and texture it.

In the first couple of weeks whilst the concept artists were creating initial designs I didn't have any environment work to do. So I set about creating concepts in 3D in an effort to aid the design process.

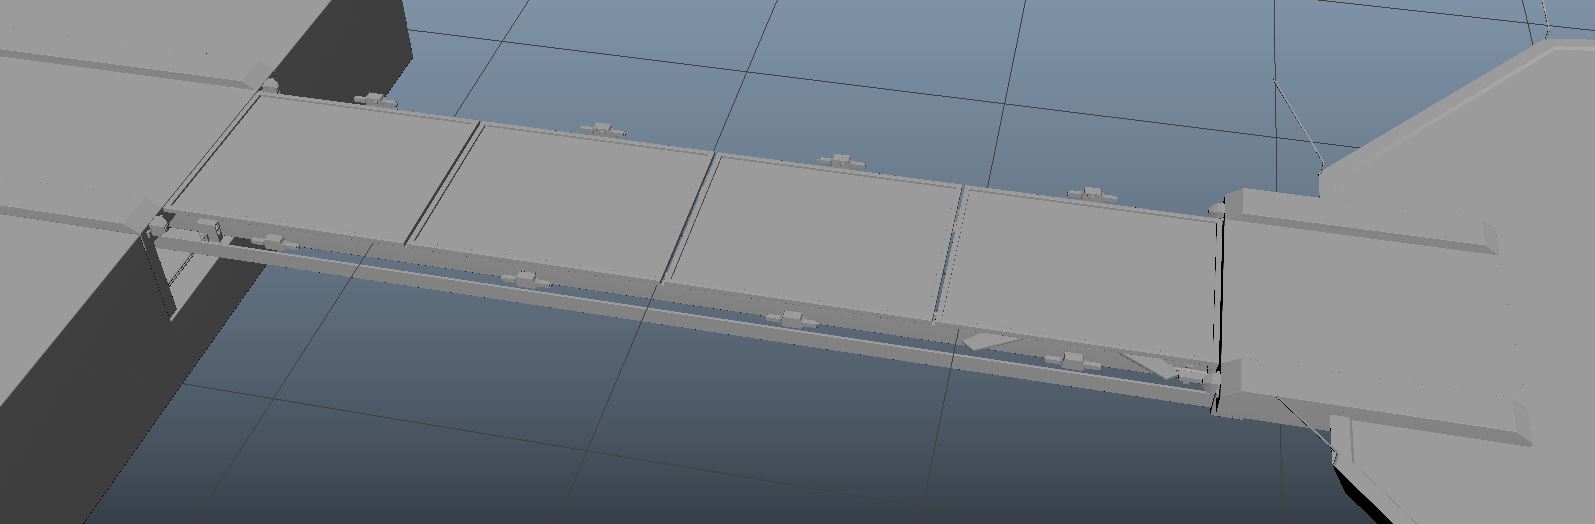
In the first few days of the project I created a concept/ design in 3D for a bridge that connects a heli pad to a base. It was just an initial idea I had for the player starting point. I also animated the bridge. I did this to help teach myself the basics of animation in Maya and to aid myself in relaying My idea to the rest of the team.

Heli pad concept.
I created the bridge along with its animation over a couple of days. Initial ideas and keywords we used for inspiration helped me to create a simple walkway system that is futuristic, yet believable.
The basic premise behind this design is simple. A platform (similar to a camera dolly) is fired out of a hole in the wall by compressed air. This platform is resting on a set of rails that stretch over to the landing pad. The platform holds 4 metal plates which are pulled up by levitating magnets as the platform travels along the rails towards the pad. The plates are then held in place by magnetism allowing people to walk between the pad and the connecting platform.


Here is a short video showing the animation I created. This animation helped to demonstrate to the team how we could use magnetism to solve problems in game, such as collecting objects, opening doors and extending bridges. Magnetism is also a believable concept, we already have strong electric magnets in the real world so its feasible that (in the future) humans could create magnets strong enough to hold walkways in place. It also gives us (as a team of designers) an excuse to create floating walkways, and doors. This helps to create a futuristic environment. Our aim is to create a level that conveys the time period to the player without us having to directly tell them. However this is a very early concept, and may not make it into the final game.

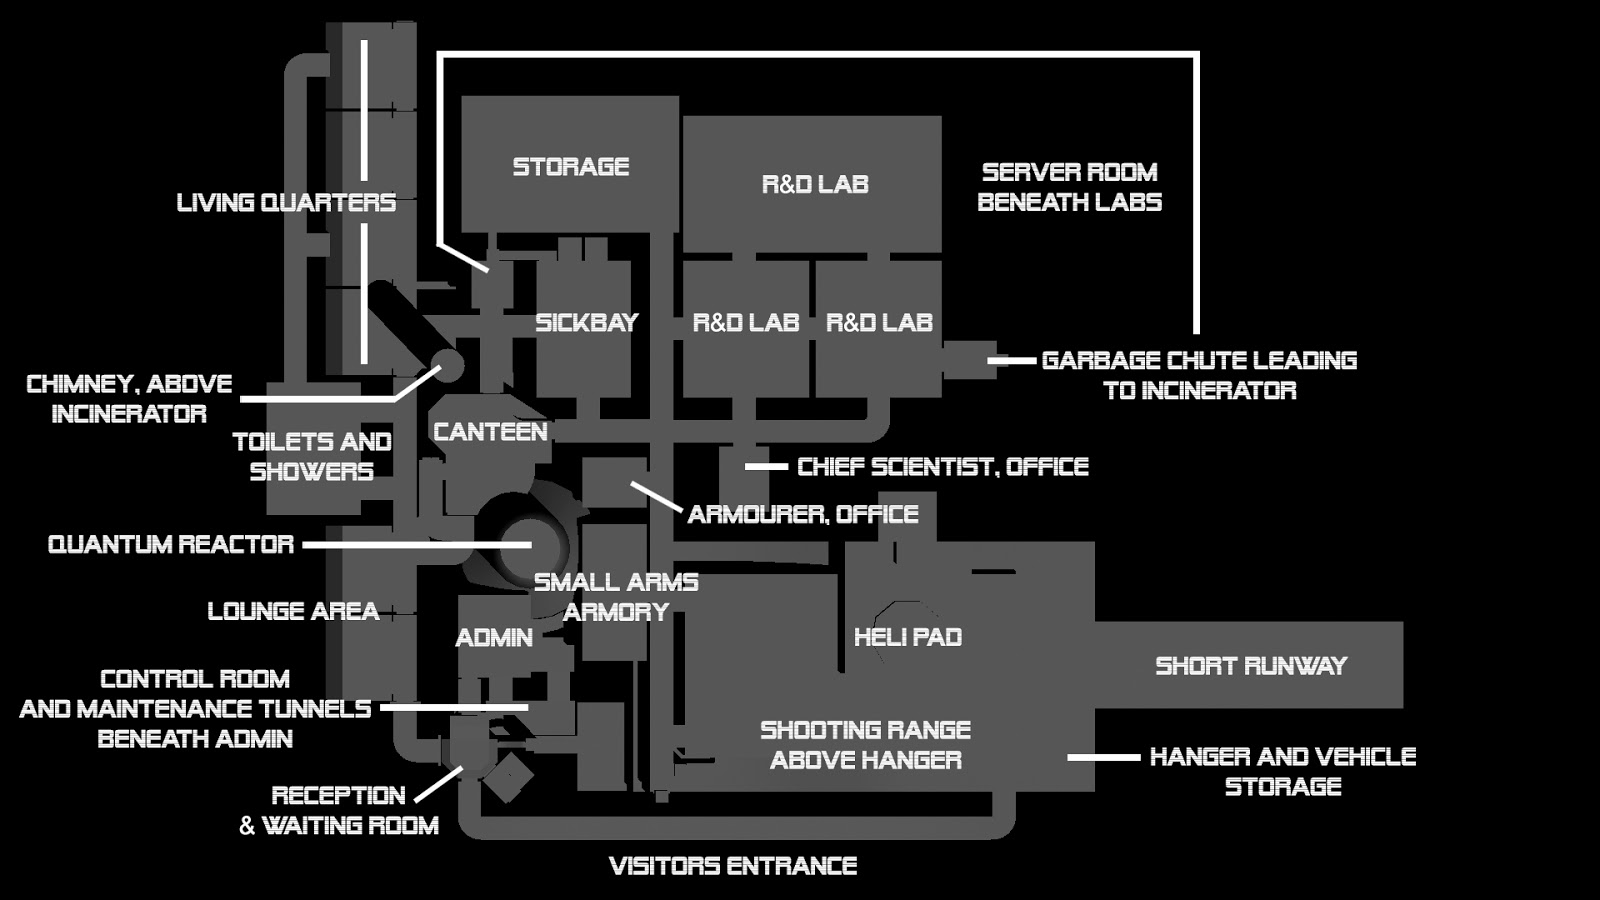
I carried on with this early concept work by creating an initial level layout in 3D. The game designer created a starting point but was struggling so I stepped in to help. I created this layout in a few hours.
My hope here was to get the ball rolling and allow the team to progress with concept work. I tried to keep game play in mind whilst creating this layout; what would be in each room? where would the player go? where will the cover points be? where will the enemy spawn? Ultimately these are all decisions that will be made by the game designer and not by me, however it is useful to keep in mind game play whilst designing an environment.


I am aware that this level layout is very large. And most likely way too ambitious, however it was useful; and stopped the team from hitting a roadblock early on. It also provided me with some useful world building experience. I had to create a base layout that made logical sense whilst keeping in mind the path the player would take.