After constructing the high poly model using Maya and Z Brush I was ready to create My low poly model. I would then bake the high poly onto the low poly using X Normal.

I made My low poly model using a variety of techniques that I have learnt from both tutors at university and online tutorials. The first one being the reduce tool, this cut the number of tris in my high poly Maya model down by about 40%. I then manually lowered the tri count myself from there by deleting unnecessary edges and merging vertices using the target weld tool. I also completely remade certain parts of the gun such as the trigger. I did this using the quad draw tool to draw a simple mesh over the top of my high poly one. I also completely remade the internals of the receiver. This lowered the tri count by a huge amount.
The model was reduced from about 3 million tris to 18,000 tris.
Now that My low poly model was finished I started UV unwrapping it one piece at a time. This is crucial as I need to have a complete set of UV's for the low poly so that I can transfer the detail of the high poly onto it through the creation of normal maps in X Normal.

I finished unwrapping My UV's then combined the objects together. After combining I was left with one mesh that had all of its UV's mapped, all I needed to do is click UV layout and Maya organised them all into the 0-1 space in the UV Editor.

I was now nearing the end of this project. I exported the low poly along with its UV layout and plugged it into X Normal. I placed the high poly into X Normal along with the low poly and baked out a 4k Normal Map and a 4k Cavity Map.
I then opened up Quixel 2.0 and plugged both maps into DDO along with My low poly mesh. I hit create and off it went.
Once DDO had finished I opened up 3DO and looked over the low poly with the maps applied. I then began to make changes in Photoshop to the maps, I added text onto the side of the gun using NDO. I also tidied up the normal's.
 |
| I added the company logo onto the top of the receiver. |

Once I was happy with the normal and cavity maps I began to texture using the colour ID's. Colour ID's specify where I want the textures to go.
Using the colour ID's I added smart materials from Quixels library of textures.
This represented the final step in modelling/ texturing the gun. I tweaked the cavity maps a bit and voila, I had a complete model.


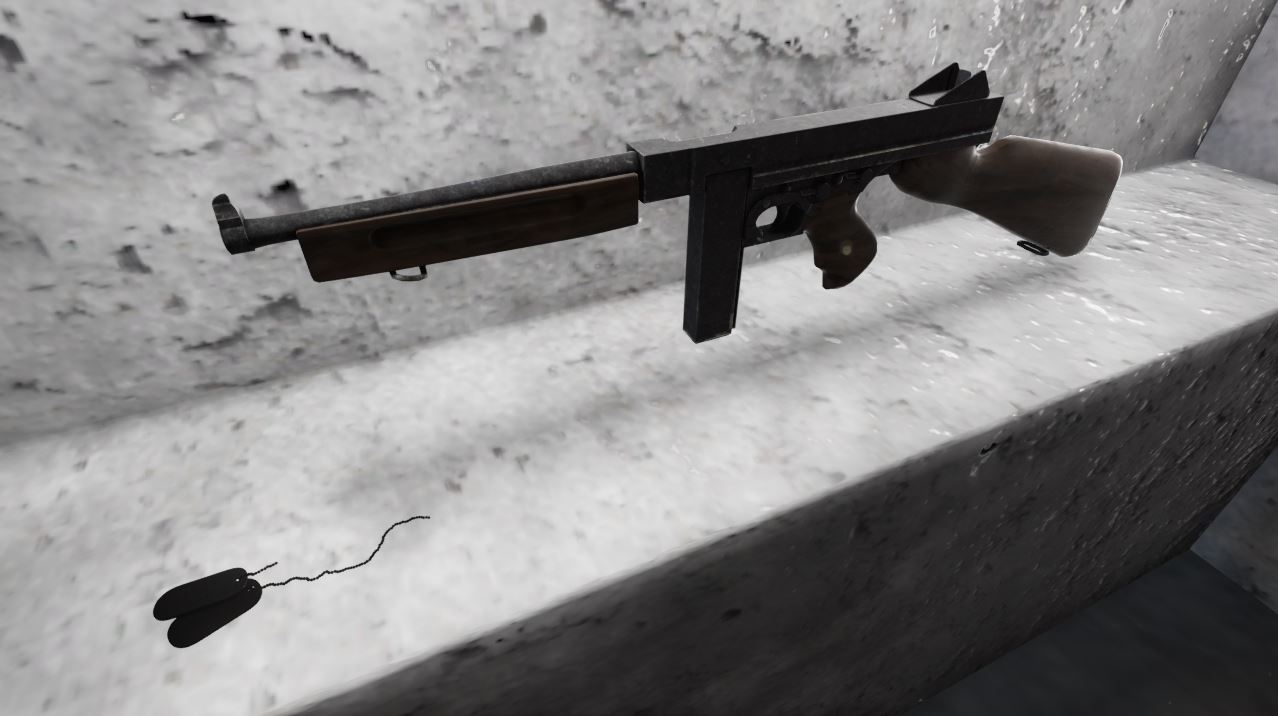
Now that the asset was complete I decided to render it in a scene using Unreal Engine 4.
I created a concrete bunker and some dog tags to place into the UE4 scene to help present my work and set the Tommy gun in an appropriate environment.
 |
| I created a set of dog tags using My name, just a small easter egg and a way of Me leaving my mark on the scene. |
 |
| I added particle effects into the bunker along with lights. |
 |
| Dog tags in the scene. |
 |
| My complete UE4 scene. |


There are a few tweaks I might make to the scene before hand in such as scaling the textures to fit and changing the lighting conditions. But all in all i'm happy with the way the scene, along with the asset has turned out.
I hope You enjoyed following Me through this process from start to finish, thank You for reading.
No comments:
Post a Comment