This post focuses on My triple A Asset for Winter Submission.
This is a project that spans a couple of months, its My first attempt at making a high poly asset by Myself without a tutorial to guide Me. I spent the first couple of weeks of this project researching and gathering reference for multiple possible assets; and completing the Combat Knife Tutorial that I posted about earlier.
After looking at different objects I decided to make a M1A1 Thompson Sub Machine Gun (Commonly referred to as a Thompson or Tommy Gun).
Why did I decide to make a Thompson? Multiple reasons spring to mind however the most potent of these reasons is clear to Me. One of my earliest memories is playing with toy soldiers on my living room floor as a child, each soldier was equipped with none other than a miniature Thompson. I used to imagine them running around shooting each other ducking and weaving in and out of cover, it fascinated Me as a child and still does today. Over time the Thompson has been ingrained into my subconscious through multiple sources. Almost every game set in WW2 utilizes the Thompson along with games set around that time period such as Mafia 2. Films and TV shows set in WW2 such as Saving Private Ryan and Band Of Brothers also feature the Thompson. It is a truly iconic gun.
 |
| The Thompson in use, Mafia II. |
 |
| The Thompson in Band of Brothers. |
 |
| U.S. Marine using the Thompson on Okinawa, 1945. |
I also feel that it would be a fantastic object to model. Not only does the gun itself and history (specifically WW2) interest Me but the technical challenge it creates in modelling will push Me and stretch My modelling ability to its current limit. The texturing process towards the end will also be very interesting, the gun has lots of rough dark wood and old aged metal that will hopefully shine through on the finished asset. I feel as if it is a good challenge and one I will learn from.
 |
| Folder containing all of the reference I have gathered, I will use as much of this as possible whilst i'm modelling. All of the reference came from open source and public websites such as Google Images. |
I began by sifting through the reference images I have gathered. I found a photo of a Thompson (specifically the M1A1 variant) that I thought would be perfect to use as reference.
I began modelling using the Quad Draw tool. I used Quad Draw because it allows Me to create complex shapes at ease and ensure those shapes remain entirely made from quads. This is especially useful when modelling a high poly assets that You know will be taken into a sculpting package such as Z Brush.
I modelled the wooden grips and stock first as they were the simplest parts of the gun to create.
I then extruded them and scaled them until I thought they were the correct width. I couldn't find any reference for the width of the gun. I even tried looking for original blueprints however nothing turned up. So I looked at multiple photographs to try and judge the width by eye.
After I had blocked out the grips I began on the body. If you look closely at the Thompson You can see that the main body of the gun is actually comprised of three separate blocks of metal welded together. I want the weld to be 3D on the model and not just a texture. I created these three blocks of metal using quad draw and pieced them together.
You can see below how I zoomed right in and adjusted the vertices individually to ensure the three blocks of metal fit together perfectly, I will bevel these edges later on to create the weld.
After the main body of the gun was made I began working on other parts of the gun. I wanted to create the metal sheet that houses the iron sights fairly early on just to compare it to reference to check and see if I had the width of the gun correct.
When compared to an actual image of the iron sights the width of the gun i'm making seems accurate.
I created the barrel and sights on the end of the barrel next, I used the image as reference. I tried to be as accurate as I could whilst making the barrel.
I then decided to fine tune and finalize the wooden grip on the barrel. To create a perfect indent on the grip I created a rectangle then added half of a circle to each end. I placed this object behind the grip in x ray mode then snapped each vert on the grip to the verts on the object. This created a loop on the grip the same shape as this perfect object behind. I then extruded inwards and scaled down the loop. this left Me with a dip that when smoothed looks just like the indent on the grip of the gun.
I also carved out space for the barrel on the top of the grip. Using edge loops and pulling vertices around I manged to create a snug fit that allows the grip to hug the barrel.

After completing the iron sights on the end of the barrel I moved back to the iron sights I began making earlier. The metal plate that forms the rear iron sights is actually part of the metal plate that is attached to the gun. It is carved out then bent up into position. The indent on top and the hole in the center are then punched out. To make this piece I saturated the area with multiple edge loops. I then started moving edges and verts around until I had a shape the same as the rear sight, I then extracted these faces and moved them up. I bridged the wholes that now existed on both objects. I then flipped the piece I cut out upright (look at the above screenshot) once I had done this I had the shape I needed to work with. I then created the hole in the middle of the sight. I used the same method as earlier when creating the grip to create the hole, I used a cylinder placed behind the sight in x ray mode to align my verts so that I created a perfect circle. I then deleted the contained faces and bridged the gap that now existed between the two sides of the sight.


 |
| Here You can see the process I used to create the iron sights. |
You can see here how I used the new sculpting tools in Maya 2016 to really improve the basic stock I had created. I pressed the 3 key to view and work on the mesh in smooth view. Smooth view is a preview mode that allows You to see what Your mesh will look like when smoothed.
You may be wondering why I have multiple copies of the stock in the background in the above screenshot. When I work in Maya I tend to create multiple copies of the same object. I do this so that if I ever need to go back to a simpler version of the mesh i'm working on I can. It also means I don't have to constantly revert back through My save files to find an earlier version of the mesh i'm working on.
I did the same to the grip and then fitted it to the gun.
I then began work on the magazine. I tried to get as close as I could to the real thing, I spent hours looking through research and documents to see how the magazine was made. The metal guides on the rear of the magazine fix it in place when it is inserted into the gun. These were created using the non linear bend tool.
 |
| I was careful when making the iron sights. I wanted them to be accurate and suitable for use in a first person shooter. |
I then began work on the receiver. This was in all honesty the most difficult part of the mesh to construct. I made my high poly Maya model to be as accurate as possible to the real thing. This included the internals of the gun.
You can see in the screenshot above how I built the bolt along with the magazine hot shoe. It may look fairly simple however the receiver was simply one of, if not the most difficult object I have modeled in Maya so far. Keeping the topology even proved challenging and I spent lots of time using the multi cut tool and the target weld tool to retopologize My mesh. The difficulty was keeping the receiver as one single mesh in Maya. The inside of the receiver is a very peculiar shape that required a lot of thought, however I feel as if it paid off, even if it won't be visible on the low poly. It is a challenge I set myself and one i'm glad I completed.
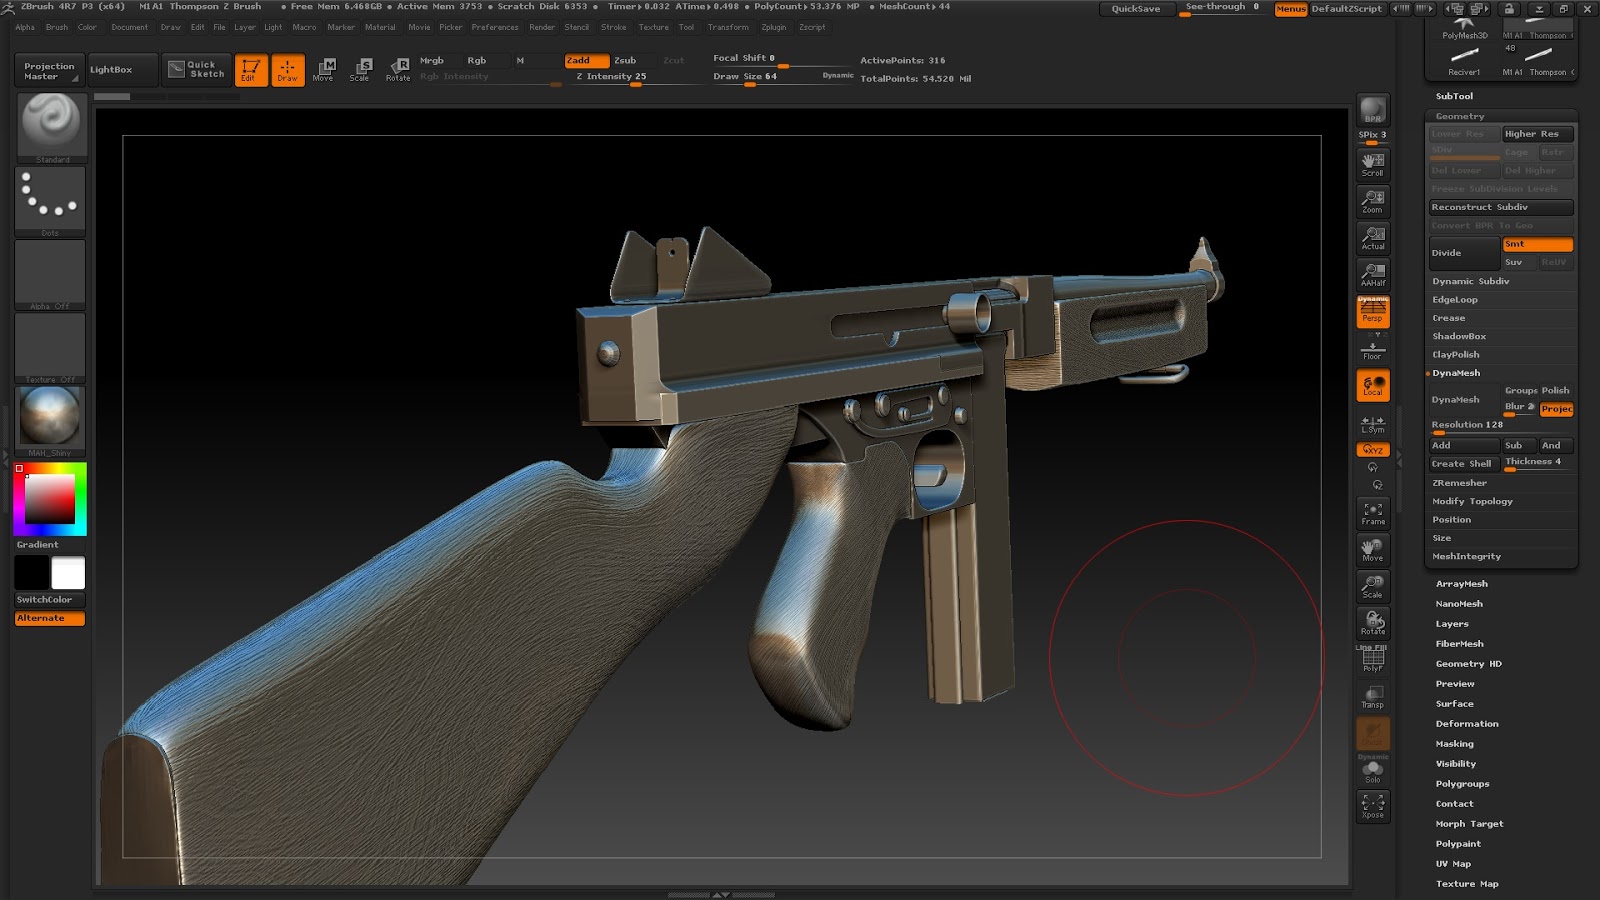
From here I took the model into Z Brush.
 |
| The high poly mesh reached 55 million tri's in Z Brush. |
In Z Brush I smoothed out any hard edges by dividing the mesh up again and again. I then added the wood grain to the stock using alphas and noise.
The high poly model was now complete.
See part two for the final steps of this process.