Tuesday, 24 March 2015

Unity Project (Spring Submission): Last Stand

This post focuses on our spring submission project.

We were asked to design and build a third person, flying action game. It also has to have a high score system in place.

We grouped up into groups of 4, my group consisted of Me, George, Reece and Jay. We immediately set about assigning roles and designing our game. After an hours discussion we settled on designing a third person game set in space. This way we give ourselves freedom to design whatever we like and we don't have to create terrain under the player, this lowers the poly count and frees us up some time.

We each set about designing different parts of the game. I was tasked with designing and modelling a space station that the player will be defending.

I started out by doing some quick colour sketches for my different ideas.

I eventually settled on designing the station on the right of the page.


As a group we created a one sheet describing our game. you can see here early concepts such as models and drawings.

First Draft One Sheet.

Modelling the Station

I modelled the station in different stages, I started off designing the gun pods attached to the ship then moved onto the main body. I was trying to create a futuristic design but retain mechanical elements such as hard edges and complex framework.


The framework is very high poly so I will probably have to remove some girders or simplify them down.


You can see here how elements of other designs I created during the concept stage made it onto the model.

Re Modelling

Unfortunately I lost a copy of the model containing vital changes to my model. This was due to a computer crashing without me saving. I remodelled the main body and imported the assets I created into this new scene, I then pieced them all together to create the new station.


You can see here how I made the main body as close as I could to the original. It is however thinner than the original.


I followed my original sketches as closely as I could. And I added the gun pods complete with turrets.

Modelling the Turret

The turret is the highest poly object in the scene. It consists of over 100,000 tris. This is obviously too high to be placed into the game however I wanted to try and challenge myself with this design. The turret was inspired by cannons used on attack helicopters used by the US military. Another source of inspiration was the Thompson sub machine gun used by gangsters in prohibition America. They utilized a drum magazine to achieve a high rate of fire, the cannons I designed are also made to have a high rate of fire.


Creating Normal Maps For The Turret

Because the turrets were so high poly I couldn't place them straight into the game without creating performance issues. I chose to bake the detail down onto a low poly version of the turret. To do this I needed normal maps. To create the normal maps I used the 'Transfer Maps' tool in Maya 2014. I placed an envelope around the high poly turret and baked it onto a low poly. I then took the normal maps created in Photoshop to tidy them up.


Transfer maps tool, creating an envelope.


Tidying up the normal maps to create a clean texture.


Applying the maps.

Mapping and re sizing the uv snapshot.


Encountering Problems With the Scene/ Station

I was finally ready to apply the maps to the station, however I unfortunately encountered problems during this process. The textures weren't applying correctly.

I decided to place the station into an early build of the game and fly around it. I did this to get an idea of the scale/ proportions of the model. It wasn't good news. The station was massively out of proportion with other parts of the station. There were also other changes I wanted to make to improve the design and optimize the geometry. The station maxed out at 1.7 million tris. this is way too much and won't run properly in game. I decided to optimize the model best I could and change the proportions of the station.


Re Modelling

I went back into the scene and started to make changes to the mesh. I extended the main body of the station and reduced the size of the turrets. I also added detail to bake down onto the hull. I removed excess framework and added the low poly turrets complete with normal maps.


You can see here how I extended the body and removed excess geometry.
I decided to scrap this model and start a new one, I made this decision to start over due to problems with the mesh and texturing. I also struggled to reduce the number of polys down to a reasonable level from 1.7 million. I will export certain parts of the station and use them again on the new design.

Starting Again

I restarted the modelling process and created a cleaner more defined model. I began modelling using another early sketch for reference. From this point on wards I tripled the size of the station by duplicating the body twice to create living quarters and a communications array.


Communications array.
Once the model was complete I began texturing piece by piece the hull. I created seamless diffuse and normal maps using images found off of the internet.
I took them into Photoshop to create them.


I made all of the textures using Quixel Suite.


Example of a diffuse map.

Example of a normal map.


All of the textures used on the station.


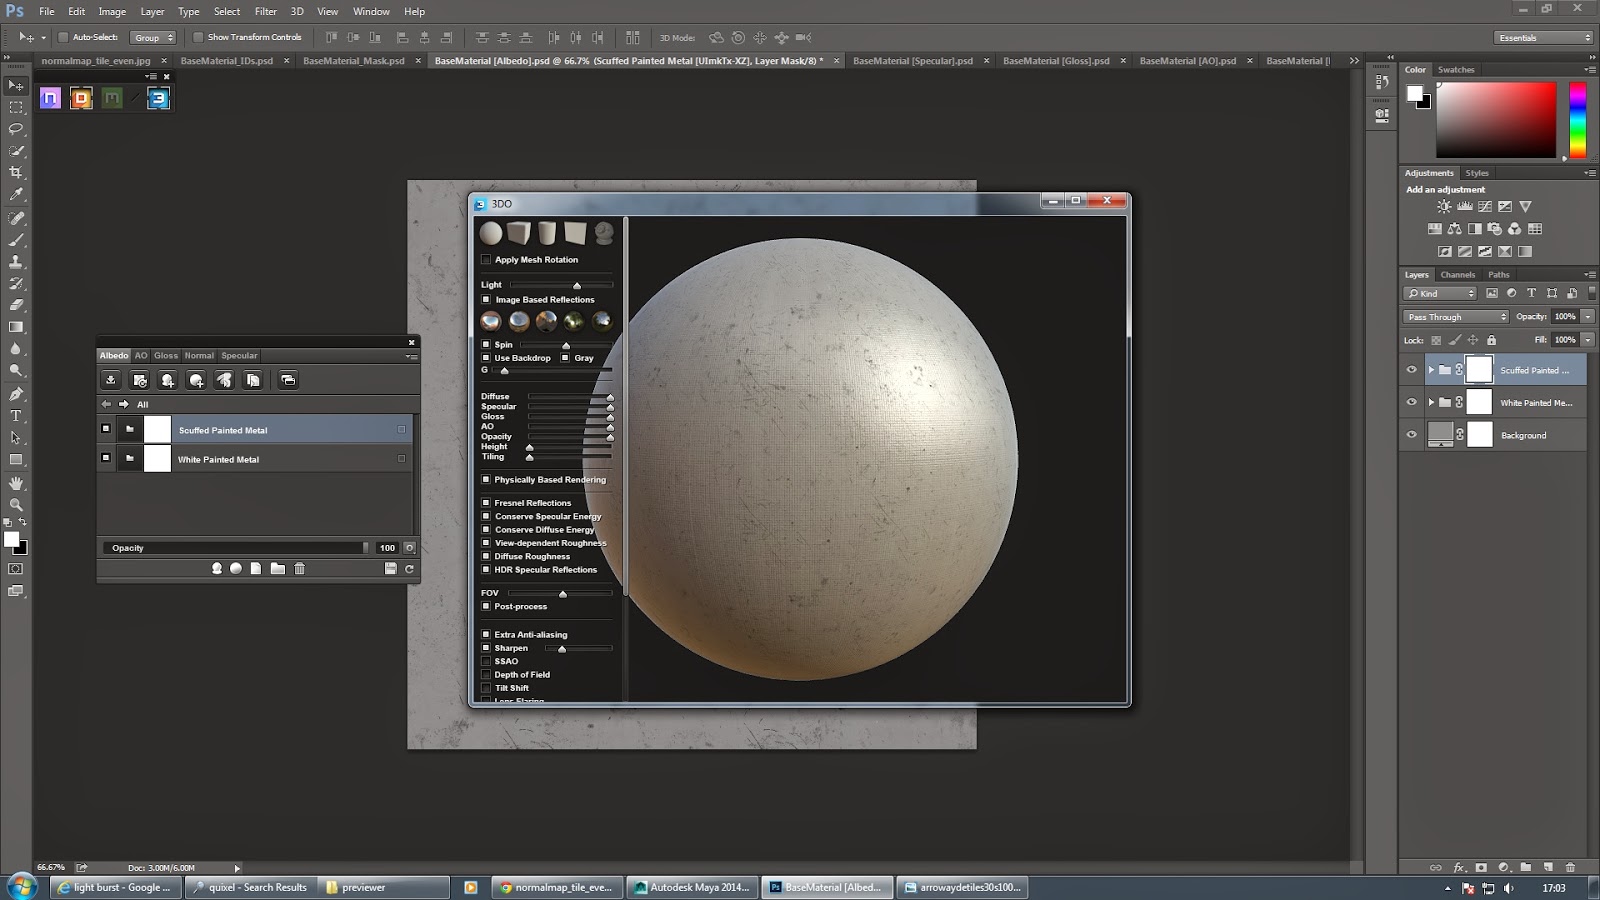
Using 3DO to preview the textures before use.

Applying the textures to the mesh.


because I triangulated the mesh I had difficulty applying the textures evenly. However I fixed this by selecting all of the faces on one surface and clicking 'planar mapping' this made it a lot easier to place my textures into proportion.

Station with a few maps applied.

Applying a normal map to a uv snapshot to get the scale correct.
Once I had the station modelled and fully textured I lit the scene and rendered some images.

Here is the station completed in Maya.


Taking the Station into Unity

Once the station was complete I exported it from Maya as an FBX and embedded the media. This took the model complete with textures and normal maps into a unity scene. In unity I applied animations to certain parts of the ship. I also added lights to create shadows cast across its surface.


I think the model looks much better with lights applied in unity than it does in Maya. Once any changes had been made to the station I compressed the station into a unity package file. This allowed me to create a prefab that I could drag and drop into any unity scene.

Code I Wrote For The Game

I wrote out some code that meant that whenever the main player ship fires it plays the noise of a laser gun firing. It also changes the pitch of the sound meaning that every time the gun fires you get a different sound.


Sound Effects I Downloaded For The Game

I have in total between 10 - 20 sound effects all organised into separate files ready to be placed into the game. Unfortunately most of these haven't made it into the final game, we had problems with the code for our scene that removed the sound. Me and the rest of our group attempted to fix the problem however we have ran out of time and are not able to fix the problem in time.

All of the sound effects were sourced from freesound.org.


Station In Game


Artwork created for the game using a render and Photoshop.
Here are a selection of screenshots from in game. You can see the station fully lit and textured.


Overall I am happy with the way this project turned out. It was stressful at times however I have learnt from this process. Texturing was not something I felt comfortable with before this term, however now I feel I have a good knowledge of basic texturing. I am also happy with the final design. The lighting works well and helps to create a sense of depth and place. The design also matches the design of the ship and is clearly distinguished from the organic design of the aliens. 

Photoshop: Painting an Anthropomorphic Frog

This project we had to design a frog using anthropomorphic design. What is anthropomorphic design? It is designing an object with human features/ emotion.
Follow the link below to learn more about anthropomorphic design.


I started off planning to paint a couple of frogs standing up, I left room on the right hand side of the canvas to paint another design if I had time too. I started drawing out the outlines and lining out the features of the frog using light black lines.


I used an image of a frog found online as a reference.


I painted over the frog on a separate layer using the colour picker to select the colour in the photo. This meant I got a more accurate depiction of the frog. It also copied over the lighting and allowed Me to create better shading. 


I used a technique called daubing, I dabbed the paint brush over and over constantly changing the colour of the brush to the the colour of the photo behind it.

Once I had put blotches of paint onto the new layer I used the smudge tool to blur together the colours, and make it look more like a painting.


You can see how I repeated this process over and over within the outline I drew out until the main body was complete.


I completed the rest of the body without any reference, I struggled with this as Photoshop painting accurately without using reference is something i'm not used too. I'm sure over time however I will improve using paint without any reference.

Finished piece.

I am happy with how this painting turned out, especially the colour, however due to time constraints I rushed the legs and arms. They are untidy and don't really fit in with the torso. I need to get in more practice using this technique however I am pleased that i'm pushing my own limits and trying methods of working outside of my comfort zone. If I was to return to this piece I would definitely finish painting the legs and refine the outlines/ proportions.

Tuesday, 3 March 2015

Unity: Coding a State Machine

This post focuses on coding in C Sharp and creating state machines.

I have struggled to grasp coding since the start of this course, and unfortunately state machines were a difficult concept for Me to understand. However I am going to practice and do some tutorials over the coming weeks to hopefully improve on my ability to code.

Below are some screenshots of the code I wrote with the help of a tutor and classmates.


Maya: Texturing an Alleyway

This was a lesson/tutorial on how to texture an object using Maya and Direct X 11 shader's. Texturing is the process of applying a 2D image to a 3D object, however just simply adding one texture is often not enough to make an object appear real. Normal Maps, specular maps, diffuse maps ect all work together to create a surface that tricks the eye into thinking its real. DX11 contains programmable shader stages that allow the user to fine tune their textures with greater ease. 

Using Direct X 11 allows someone to use high level shading language (HLSL) to add shader's to an object with a greater amount of detail and speed. A link can be found below containing information on DX11 shader's and HLSL.


I was given a Maya scene and taken step by step through the process of texturing. The first thing I did was load DX11 and set it to auto load. This means that every time I open Maya DX11 shader's will be available for me to use. I then opened my settings and enabled OpenGL under the Display tab. This allows Maya to use Physically Based Rendering. I also set the renderer to Viewport 2.0. This allows me to see DX11 shader's which appear white when in the viewport. I then restarted Maya. The scene was now ready to be textured.

Enabling DX11 shader's in my scene.

The scene given to me to texture.
Once the scene was open in Maya I began systematically working my way through objects and texturing them one by one. The barrel was the first thing to be textured. I opened up a UV snapshot of the barrel in Photoshop. I then copied in an image of wooden planks provided by my tutor and began shaping it to the barrels UV snapshot.

1st attempt at texturing the barrel in the scene using Photoshop.


I applied the diffuse texture to the barrel. However it looked very bland and didn't stand out, I also forgot to texture the bottom and top of the barrel. So I went back into Photoshop and added in some metal braces to match the mesh geometry. I also duplicated the image of the wooden planks and placed it on the bottom/ top of the barrel.


To help the braces stand out against the wood I multiplied some images down on top of the metal and combined them together. I also adjusted the levels of the wood which helped emphasize the splits in the wood by creating contrast, all of this helped to make a more realistic diffuse map/ texture.
    
Final diffuse texture for the barrel.
I saved the diffuse texture as a Targa file and applied it to the barrel. I then began work on the rest of the scene. 


Texturing the walls and alleyway was again a simple task, using a UV snapshot I was able to line up the images given to Me by my tutor in Photoshop and save them as a Targa file, they were then applied to the mesh in Maya. 

Diffuse textures applied in Maya. Both the barrel and the floor/ wall are textured in the scene.
Once the floor/ wall texture was placed into the scene I started texturing and adding details such as the drain pipe, manhole, grime and grit, grating ect. When I began adding these textures I forgot to make use of the UV snapshot like I had done for the floor/ wall so a few of the images were out of place like this drain. However as soon as I realized my mistake I quickly made use of the snapshot to line up the textures in Photoshop. 

What can happen when you forget to use the UV snapshot. 
I applied some finishing touches to the scene (dirt and wear around the manhole cover, rough paint on the wall ect.) and rendered the result. The wooden planks covering the window and the window itself were the last textures I applied.

The finished scene.
If I was to re do this project I would make a conscious effort to remind myself of the importance of the UV snapshot, I spent 10 minutes correcting mistakes I made when I initially textured the scene. This would help increase the speed of my workflow and in turn increase how productive I am. I would also take the time to add normal maps and specular maps, adding these would create depth and contrast both of which are important if you are aiming to create a believable, virtual world. I would also consider using DDO and 3DO to generate smart materials for Me to place into the scene and optimize the DX11 shaders and their ability to make use of physically based rendering. I am unsure however if physically based rendering is exclusive to DX11 shaders.

Overall I am happy with the outcome, the tutorial helped me grasp the concept of texturing better and has inspired Me since to look into DX11 shader's and their use's.    

Monday, 2 March 2015

Photoshop: Creating a Steampunk Character

This was a week long project that required me to design and create anything Steampunk, be it a character, an object, a world ect . . .

So what is Steampunk? Steampunk is an art style, sub genre and fashion. It is a vision of the future from the perspective of Victorian society. It makes heavy use of steam power, cogs, mechanical joints and brass/ copper. Steampunk is closely related to Dieselpunk and Cyberpunk and takes a similar view on society.

Want to know more about Steampunk, Dieselpunk and Cyberpunk? An interesting article on these genres by 'Chronicles of Harriet' can be found below. It outlines all the different types of 'punk' and their roles/ perspectives on society.


The first thing I decided on was what I would be designing and how I would design it, I chose to design a character. I chose to do this so that I could place myself outside of my comfort zone, I naturally turn to drawing vehicles and inanimate objects because of their defined outlines, easy perspective and unique features. But I decided to give character design a go using Photoshop painting and some clever editing.

I created a moodboard to provide me with some inspiration.
First off I did some research and looked into what makes a good Steampunk character possible, I found that the world around him/her does play a heavy part in the development of a character and also informs how they look and act. For me personally a brilliant example of a Steampunk world would be the video game Bioshock. Since the original there has been two sequels, all 3 games have been set in a Steampunk universe. Having played all 3 they are the best source of inspiration for Me and will affect my final outcome. 

In Bioshock Infinite the character of Songbird defines great story telling, it is a very well designed and aesthetically pleasing character. It is also heavily inspired by Steampunk. The whole idea of a flying man in a suit isn't a new one though, in the late 1800's/ early 1900's inventors and pioneers around the world were inventing incredible flying machines of all shapes and sizes, most of them however died trying to fly them. Its this period of time that inspired Songbird's design and the idea of a 'flying man' will inspire my design.

Songbird from Bioshock Infinite.
Below are a set of pictures demonstrating just a handful of the designs created. You can see how the stretched canvas wings and the spindly wooden frame holding it together inspired Songbirds design. 


One thing that is clear with all of these designs however is where they took their inspiration from. Birds and their wings were the obvious source of inspiration for these inventors, they look very different from the planes of today. In my own design I must reflect this and use a similar wing design. 


One thing I also have to think about when designing a flying man is how will it work? Will it be powered by some sort of miniature steam engine? Or will it be powered by hand? I feel that inventing a wing suit that you have to power somehow by hand would be the best route to go. I think using man power adds an element of charm to the design, it doesn't seem so mechanical and makes it more approachable from the audiences perspective. its not so complicated and is a simple concept to grasp.


Above is a complicated design and below is a simple design. I feel that a simple design works better from an audiences perspective because its less to take in, its not quite as busy a composition as the image above for example. The design above also takes time to figure out how it would work, its not inspired by nature whereas the design below is instantly recognizable as a bird; which we subconsciously associate with flight.   

Probably my favorite design of them all. Elegant swept back wings and a sleek tail.

Brass cogs are tied to designing a solid Steampunk world.

When designing the flying man and his wing suit I must keep in mind that I am designing a Steampunk character. An easy and effective way to ensure a character looks Steampunk is to add cogs to his/ her design. Cogs are closely tied to Steampunk as they essentially replace electronics and hydraulics. They transfer kinetic energy to make something move, this is important in a Steampunk world where steam power is the dominant power source. They were used extensively throughout the industrial revolution which is the time period Steampunk originates from. They are also very aesthetically pleasing to look at and add a sense of mystery, the audience cant help but wonder how it works or what its role is in the machine.  

Its also important for me to give my character clothing appropriate to the time zone he originates from. In Victorian times it was typical for a man to wear a waist coat with smart trousers and a shirt. This is also reflected in most Steampunk designs today, women wear corsets and men wear waistcoats.

Being aware of the use of cogs/clothes and the role they play in the design of my character will hopefully mean he fits well into the genre of Steampunk.  

Typical attire for a Victorian gentleman.  

Creating the Character


First I sketched out my idea in Photoshop using a tablet. I used the silhouette technique taught to me last term. I also added a basic grey backdrop to create depth so I could get a better feel for the design during my workflow.


Once the basic outline was nailed down I painted in the wings and lined out where I think the supports should go. I curved the bottom of each section of the wing to make it look as if the wings were catching air and flying. I also multiplied an image of old leather onto the wings and warped it into position. Warping was taught to me by one of my tutors, it allows me to bend images around over a 2D image to create the illusion of a 3D image.


Next I added in shadow on top of the wings to create depth, and bring the shape of the man forwards towards the audience; further enhancing a sense of depth and perspective. It also helps to separate out the shape of the man against the wings. I then turned up the brightness on the wings to shine through the shadow.


I then added a shirt onto the outline using the warp tool.


I carried on adding images and warping them around the silhouette.


I finished adding all of the images and covered the silhouette. I then started tweaking the colour of the individual images and refined the outlines.  


As soon as I cleaned up the image I began adding shadow to the figure. this helps the piece stand out from the page and adds realism.


Finally I added a background from my own photographs to place the character into context.

Finished piece.

I have decided to call my character 'The Owl'. He was inspired mainly by Songbird from Bioshock and early flying machines, I liked the idea of a man daring to do something never done before, to inspire others and promote change, in a way it reminded Me of modern day super heroes. This makes the owl mask an even more appropriate addition. I aimed to create a figure who inspires others just like those inventors jumping off of cliffs in an effort to be the first person to fly.
I added Victorian clothing to help set the scene and base my character in the Steampunk genre, I also used cogs tucked away behind the man to create the illusion of machinery nestled behind his back. The cogs were a subtle addition, I did talk about how crucial they are earlier in this post, however I didn't want them to overwhelm the character himself. I added the old bow tie to help make him appear as an inventor, someone with stature and class. I also bronzed the wings to make up for the lack of brass in the scene.

Overall i'm very happy with the outcome. I have struggled in the past to paint in Photoshop but by using photo editing techniques and combining them with digital painting, I have overcome these downfalls and learnt how to create an effective outcome that links nicely into the Steampunk genre. Exploring and experimenting with different digital techniques has allowed me to become more confident using Photoshop, this is partly down to reading feedback given to me by tutors and learning in class different ways of approaching artwork. If I was to revisit this piece I would consider creating different variations of his wing suit and possibly adding a tail. I would also try to add more Steampunk features, maybe a top hat? turn him from an inventor into a warrior and give him a musket? all of these are valid conceptions and variations based off of this piece.

Maya: Low Poly T Rex

This project was set by a tutor, it was to make a low poly T Rex in Maya.

We were handed a scene and guided through the process of building it up from a box using a reference image. 


I moved the box into the position of the head so that I could work my way down the body starting with the head and neck. Using the extrude tool and edge loop tool I created the head leaving the neck open. I shaped the head by adjusting the verts individually to a point where I feel they should be.


I made the eye socket using extrude and scale. From this point onward I extruded each edge individually from its head down its neck, I then merged the verts connecting each face together.


I carried this process on over and over until the main body was complete, I then shaped the body by changing vertices and moving them into position.


I built the legs and feet by extruding them out from the body. However unfortunately I forgot to document the process. I transferred the finished model into Maya 2015 from Maya 2014, I did this so that I could make use of the cut uv edges tool.


Once the arms and legs were complete I smoothed all of the edges and began mapping the uv's using cut uv edges. I cut up the faces and began mapping them out.


Once all of the uv's had been unfolded and laid out, the process of building and mapping the low poly T Rex was complete.

Finished model fully mapped out and ready for texturing.
I am pleased with the final outcome of this project, but I do feel as if my workflow could of been more efficient at times, however that being said I did learn from making this T Rex. Laying out the uv's on an organic model is something I haven't done before and learning this process is something that will be useful in the foreseeable future.